Congratulations on your new TTL Setup! Here are detailed instructions on how to completely set up your Pro-Ject T1 Phono SB turntable and Kanto speakers, plus some tweaks for optimizing the setup.
1.0 SET UP KANTO SPEAKERS
1.1
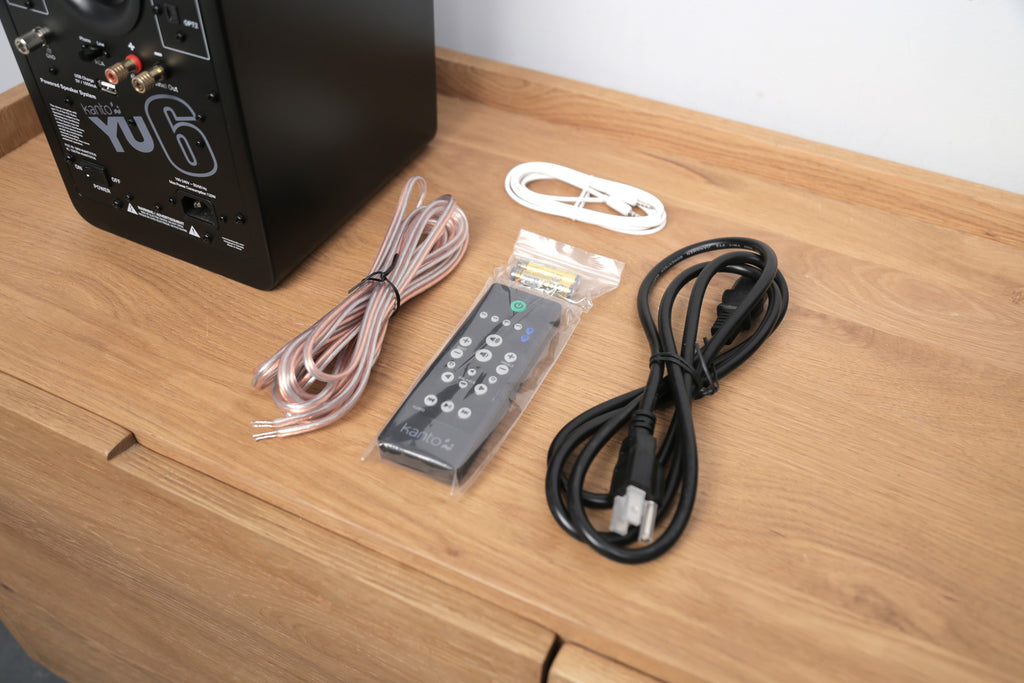
Unpack your Kanto speakers and locate the accessories and cables as shown. The clear speaker wire will be used to connect the (2) speakers together.

1.2
Position your speakers. NOTE: Position the powered unit on the left.

1.3
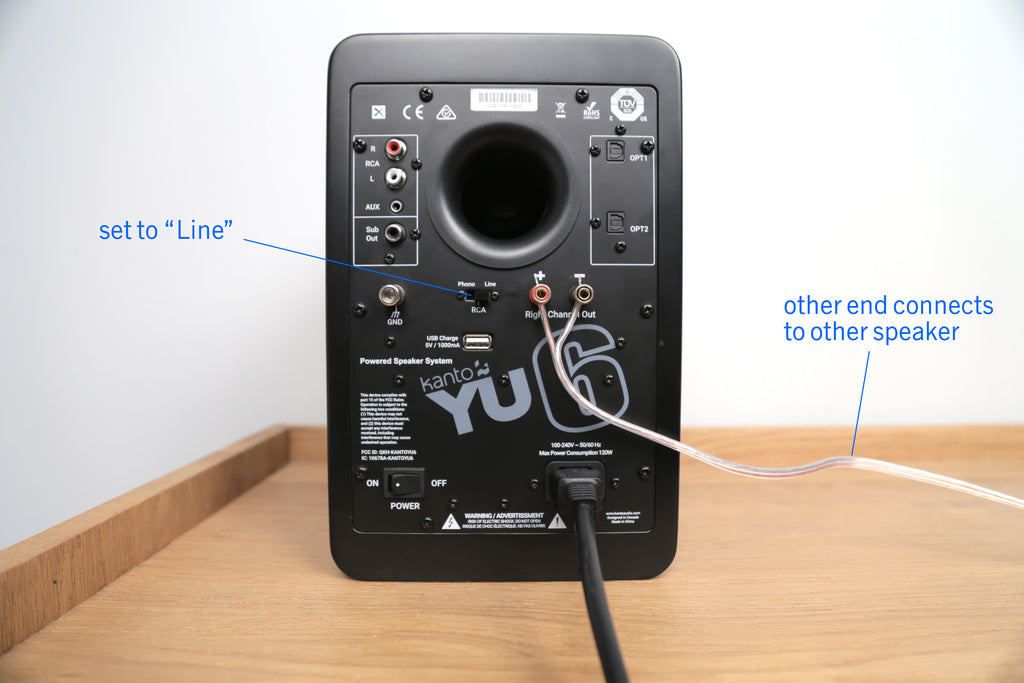
Plug in your speakers and connect them together using the speaker wire.
IMPORTANT: make sure the RCA switch is set to "LINE" (this deactivates the speakers' Phono Preamp, we'll use the turntable's preamp instead).

2.0 SET UP YOUR T1 PHONO SB TURNTABLE
2.1
Unpack your turntable body (the largest piece in the box) and the glass platter which is located at the bottom of the box. Also locate the power supply which is packed in a small white box near the bottom. You can leave the dustcover wrapped up for now. Notice that the instruction manual bag also includes the Turntable Belt and the RCA Cable.


2.2
SUPER IMPORTANT: when you have the body of the turntable unpacked, locate the pre-amp switch on the underside and make sure it’s set to LINE OUT.

2.3
Now, locate the RCA cable in the plastic bag and plug it into your turntable.
Next, attach the thin wire with U-shaped ending (the groundwire) to the silver post (since we are utilizing your turntable's built-in preamp, the groundwire is not active, but attach it anyway to keep it neat).
NOTE: If you ever want to add an external phono preamp to your system, you would attach the groundwire on both sides of the cable and turn that switch under the turntable to “PHONO.”

2.4
Plug in the turntable's RCA cable + groundwire to the speaker as shown (again, just to keep the cables neat; groundwire will not be active).

2.5
Locate the turntable belt (looks like a black string) also in the plastic bag. Wrap the belt around the silver motor pulley and larger black disc. Then, with two hands, gently place the glass platter, smooth surface side up, on the spindle.

2.6
Remove the plastic guard from the tip of the cartridge and take off the red twist tie from the tonearm.
2.7
Locate the power supply (as stated previously, this may be tucked away in a small white box), and plug in to your turntable (the power input is located in the back of the turntable opposite the RCA output).
2.8
Lastly, unwrap the dustcover and install the hinges onto those (2) silver rods on the back of the turntable.

3.0 PLAY A RECORD!
3.1
Place a record on the turntable, hit the power switch on the left side of the turntable (the platter should start to spin), then place the needle on the record (if you’re new to playing vinyl, you may want to use your turntable’s lift lever to gently lower the needle onto the record).

3.2
Press the volume knob to cycle through the inputs until hear your turntable (you can also press the "RCA" button on the remote). MUSICA!

4.0 UPGRADES (SOLD SEPARATELY)
4.1
Turntable Lab Double Layer Cork Mat ($25) - For glass platters, such as the one found on the T1, we recommend a cork / rubber blend mat to dampen any resonance that comes from the vibration of the glass.
4.2
Ortofon: Stylus OM 10 ($62) / Ortofon: Stylus OM 20 ($198) - When you're ready to switch out styluses, remember your T1's OM cartridge has an interchangeable stylus system that works with most OM series styluses. This makes switching easy (you don't have to re-install a new cartridge, you can just slide on a new stylus), and less expensive (you don't have to pay for a entire new cartridge). The Stylus OM 10 will offer the next level up in sound quality with better tracking. For a bigger upgrade, the Stylus OM 20 will give you a big boost in definition / clarity with its nude elliptical diamond tip (the 5 + 10 are diamond tipped).
4.3
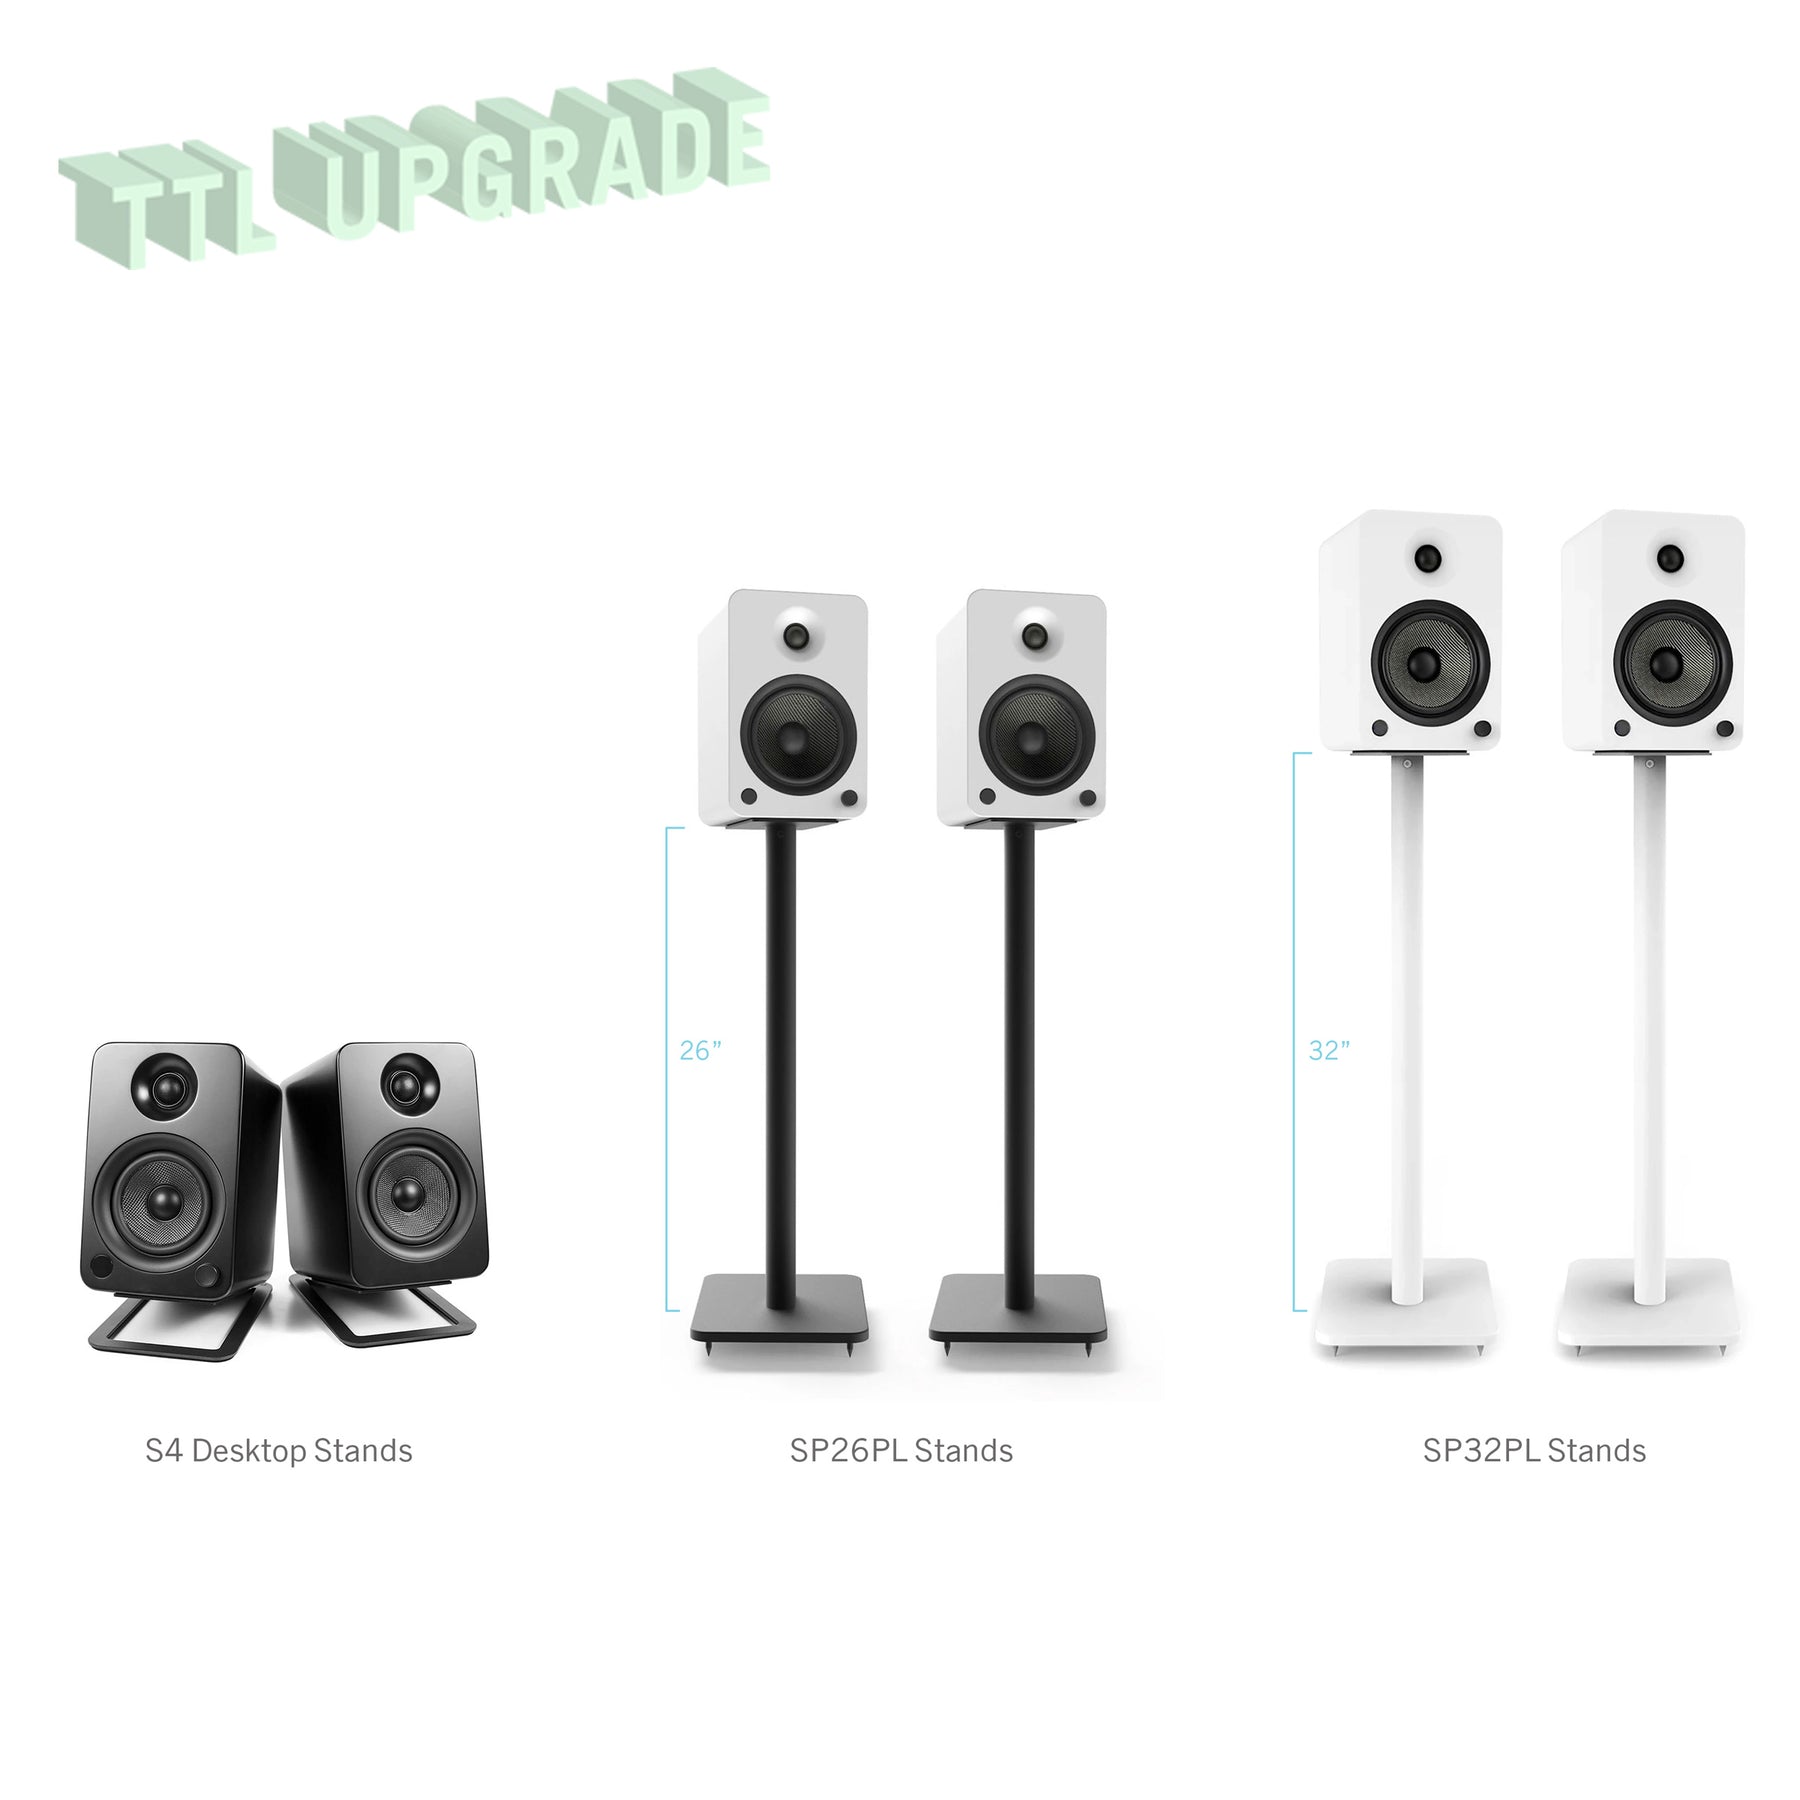
Kanto Speaker Stands displace speaker vibrations from your turntable and look great. They are available in table-top and floorstanding models.

- S4 Desktop Stands for YU4
- SP6 Desktops Stands for YU6
- SP26PL Speaker Stands for YU4 / YU6
- SP32PL Speaker Stands for YU4 / YU6
4.4
Turntable Lab: Triple Operation Brush ($25) - The Carbon Fiber brush that came included with your setup is great for everyday usage (we use one in our office). However, our new Triple Operation brush is on another level in terms of effectiveness with dual cleaning pads plus an integrated carbon fiber brush.


